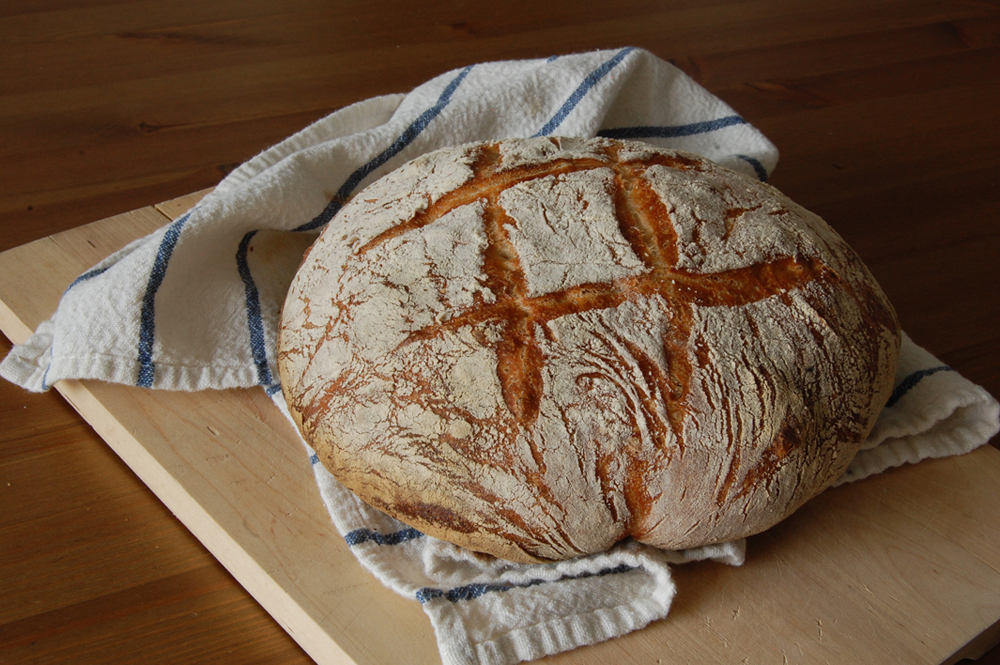
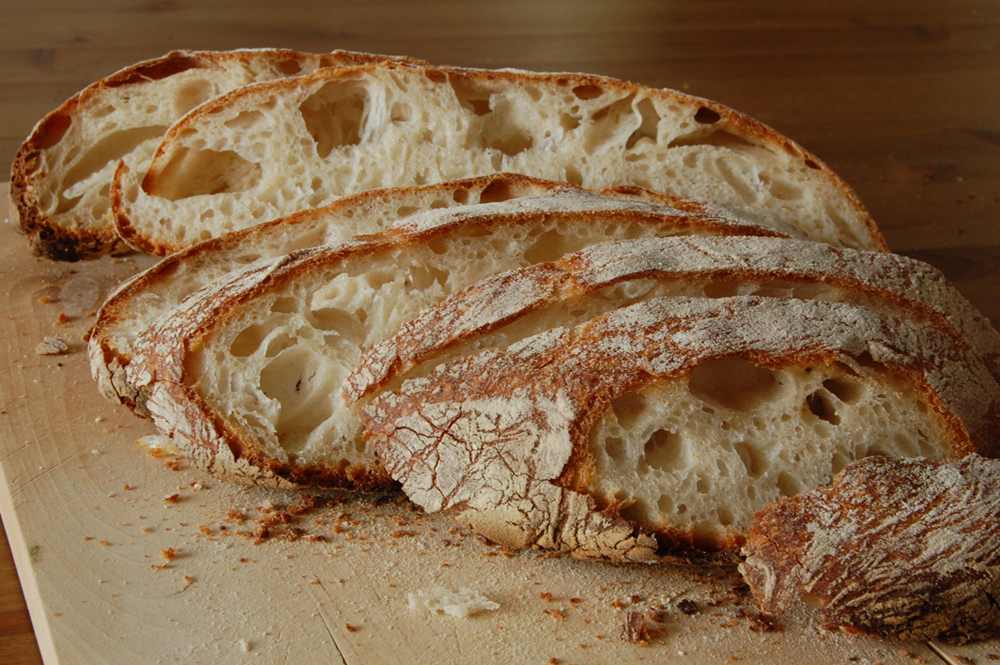
Maison Grey is the imaginary bakery that I open in my kitchen every time I turn my oven on. I most of the time bake bread, but also pizzas, granola and some pastries. I then trade, or sell my goods to my friends and neighbors.
Today, I’m sharing my bread recipe.
I’ve been baking for over 4 years now, and I must say it took me some time to find the right recipe and baking technique to get to this crusty and tasty result.
The thing is that professional baker’s ovens have steamers that inject vapor during the baking, so that the crust stays relatively moist and caramelizes instead of burning.
I followed some recipes suggesting to throw ice in a hot pan inside the oven during baking to re-ceate this technique, without success.
Crust was always somehow soft, and beige-ish. Far from the golden, crusty brown I hoped for.
The miracle came from a New York based baker named Jim Lahey, founder of the Sullivan Street Bakery. He invented two revolutionary things: first, a no-knead recipe. Second, baking in cast iron pots. You can watch a video of him demonstrating here.
I will pass on the first one, as I think his recipe makes life easier but takes way too long to rise and produce a quite liquid dough that is hard to handle. The second part is much more interesting to me, and is a big step foward in the home-baking history. Baking in a hot, closed cast iron pot create a steam room effect in which you can bake the crunchiest bread ever, while the inside still remains moist, soft and airy.
To make my dough, I tweaked the recipe of the traditional french baguette – recipe that I am happy to share with you.
To make 4 large loaf of bread, you will need the following:
Flour: 1600g / 3-1/2 lbs
Water: 1000g / 2-1/4 lbs
Yeast: 13g / 3 tsp
Salt: 26g / 4-1/2 tsp
Sugar: optional
– feel free to divide, or multiply the portions as you wish.
First, put Flour, Salt and Yeast together in your mixing bowl.
Pre-mix ingredients together with a spatula.
Add Water at room temperature, and start kneading.
Knead until you get a dough that holds itself nicely, heavy and smooth.
If too liquid, at flour. The opposite? Add water.
Kneading by hand is hard and requires a long, intense effort.
For this recipe, a Kitchen Aid will do the job. Personnally, I use a Verona Assistent. Its 2 horse power motor can handle a lot of dough at the same time, and can do it intensively. I bake everyweek, and my dear machine have been kneading for me smoothingly for the past two years.
When you’re done kneading, put your dough in a large, lightly oiled plastic container and let it sit at room temperature for at least 45 minutes.
The more you let it rise, the more it will develop this country-style, acidic taste that I really like. Sometimes I let it rise for 3 or 4 hours.
Then, transfer the dough on your counter and give it a turn. It means you want to fold it from its four sides like an envelope and turn it up side down so that the seam is underneath.
Put it back in the container for an other at least 45 minutes, or 3 hours, or more if you wish.
When ready to bake, put the cast iron pots in the oven and turn it to the max. 550°F / 290°C in my case.
Let the oven and pots pre-heat for about 20 minutes.
In the meantime, transfer the dough onto your well-floured counter. If you made the four loaves recipe, cut it into four equal parts. Roll each of them in the flour and sprinkle some extra on top. Let them sit 10 minutes, few inches from each other, as they will keep expanding. Cover with a cloth.
When dough and pots are ready, well, the fun part begins. In the bottom of each pot, sprinkle some wheat bran, just enough to lightly cover the surface. Put the dough in, close the lid and bake for 30 minutes, keeping the oven temperature at its max. For your first batch, I recommend you visually check the loaves regularly.
When ready, take the pots out. Open the lids, and take the loaves out using two large spoons. Put them on a cutting board, or best on a cooling rack.
Now your place must be intoxicated with a warm and mouth-watering bread smell. Chances are that your neighbors already came and knock at your door to get some. But wait! Don’t cut the bread right now. Not only hot bread is really hard to digest because of all the CO2 it contains, but also it’s way too hot and the steam contained inside could burn you. Plus, if you cut it too soon, your bread will somehow deflate, and loose its fluffyness. Be patient, wait at least 10 minutes.
Then, you can cut it. Eat it. Share it. Bon appetit!
You can keep the bread for a couplen of day on a cutting board, covered by a kitchen towel.
If you made some extra loaves and want to keep them, you can wrap them in plastic and store them in your freezer. That way, you will always have bread ready, anytime you wish.
To de-freeze, put the loaf in an oven at 250°F / 120°C for about 25 minutes.
Freezing bread is not only convenient but actually makes it even more crunchier, just as if it has been baked twice.


